If you already know the blog of Margaret Bremner, then you also know she has a few posts on tangles called “… and then some” where she looks at one specific tangle and plays around with it: tangleations, combinations with other tangles, different fillings, you name it. I love those posts: you find out so many new and interesting techniques and other things and they have plenty of eye candy. My new category Playground is supposed to be similar: It’s a post in which I show you what my results of playing around with a tangle are. I don’t think I’m nearly as good or creative as Margaret Bremner is, but I had lots of fun playing and I do hope you enjoy this new category! I’ll start off with the latest official tangle, Molygon, which was officially presented here. If you already did some research on Molygon yourself, too, and want to share your results, please feel free to add the direct link to your post/picture in the comments.
TIPPS for Tangling Molygon
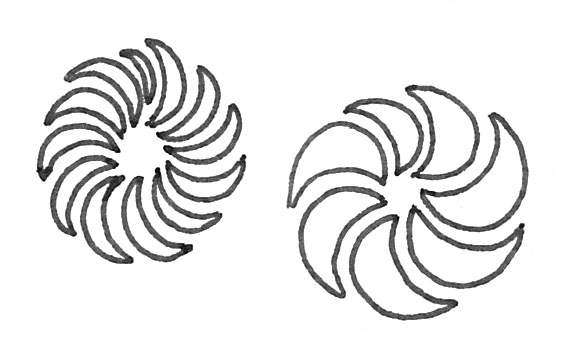
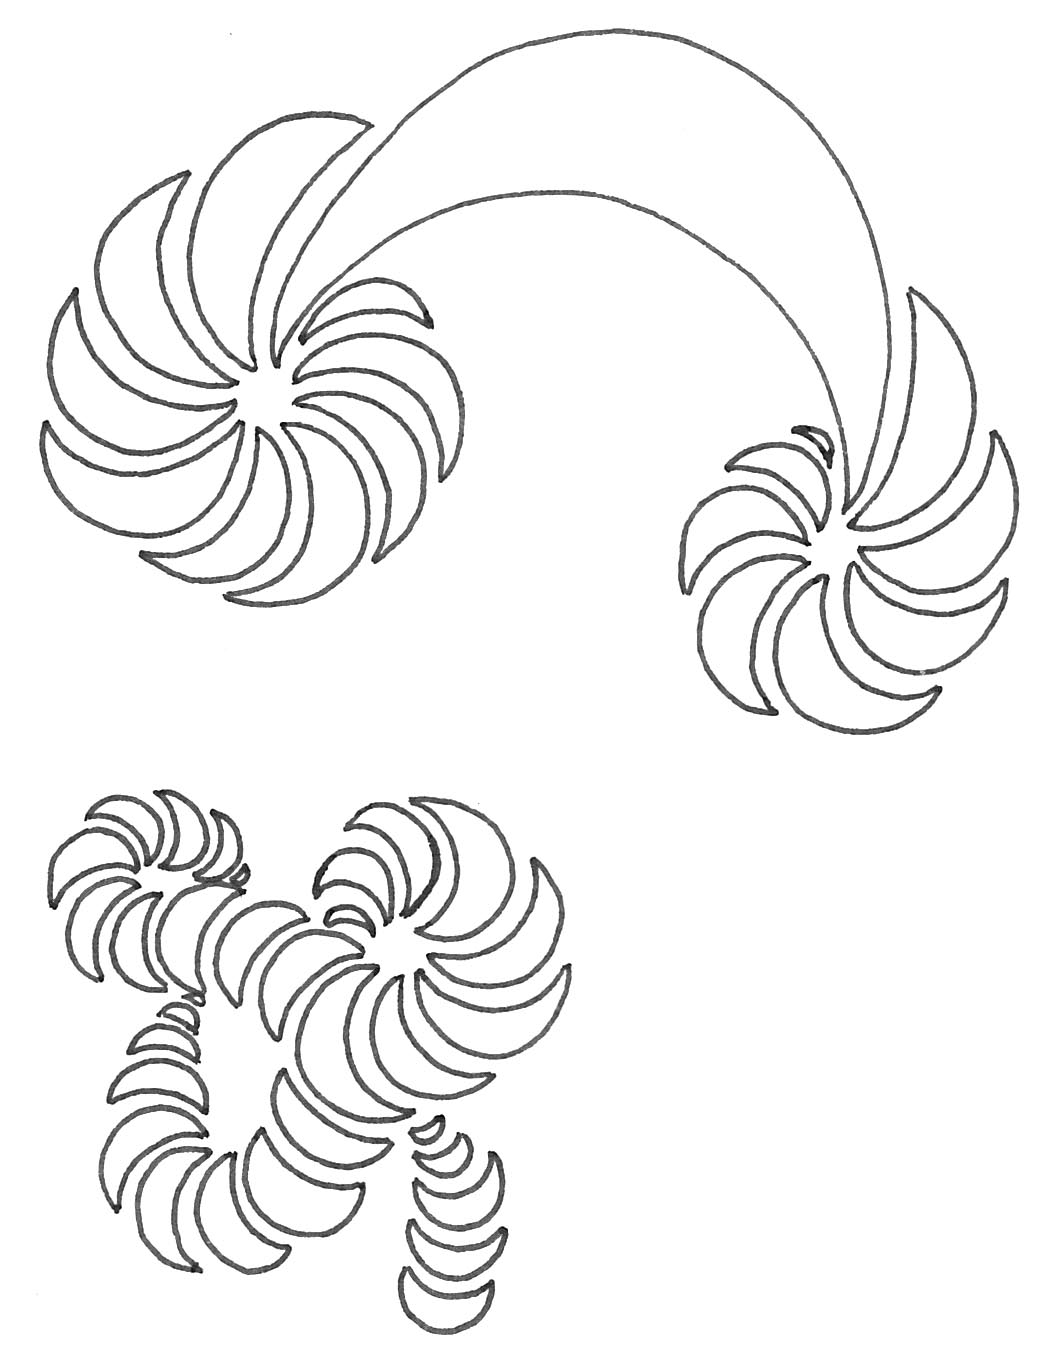
1. At the Zentangle meeting in Berlin earlier this month, CZT Sabrina gave us the clue to pay attention to the gaps between the “croissants” or “bananas” oder “half-moons” or whatever you want to call the shape. And the circles and “snakes” does look somewhat nicer with even gaps, don’t you think? Don’t forget to turn your tile when you’re going around in a circle! It makes everything much easier.
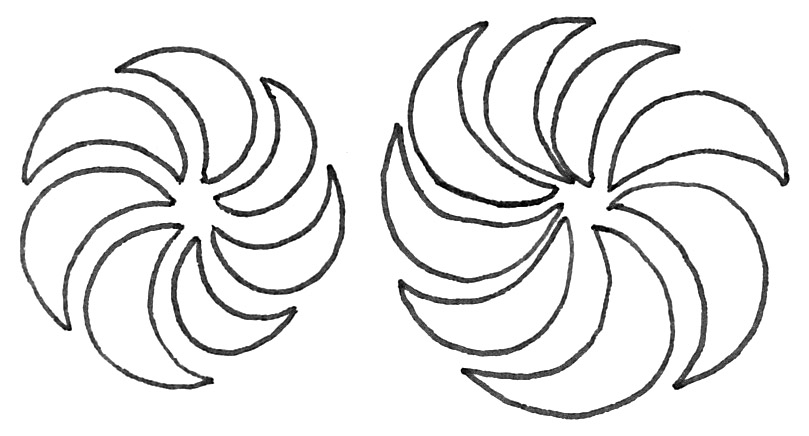
I think uneven gaps may also give interesting results, but for now, even gaps give it a smoother look.
2. However, why always so stiff an orderly? What about a space without circles or snakes filled irregularly with bananas gone wild?
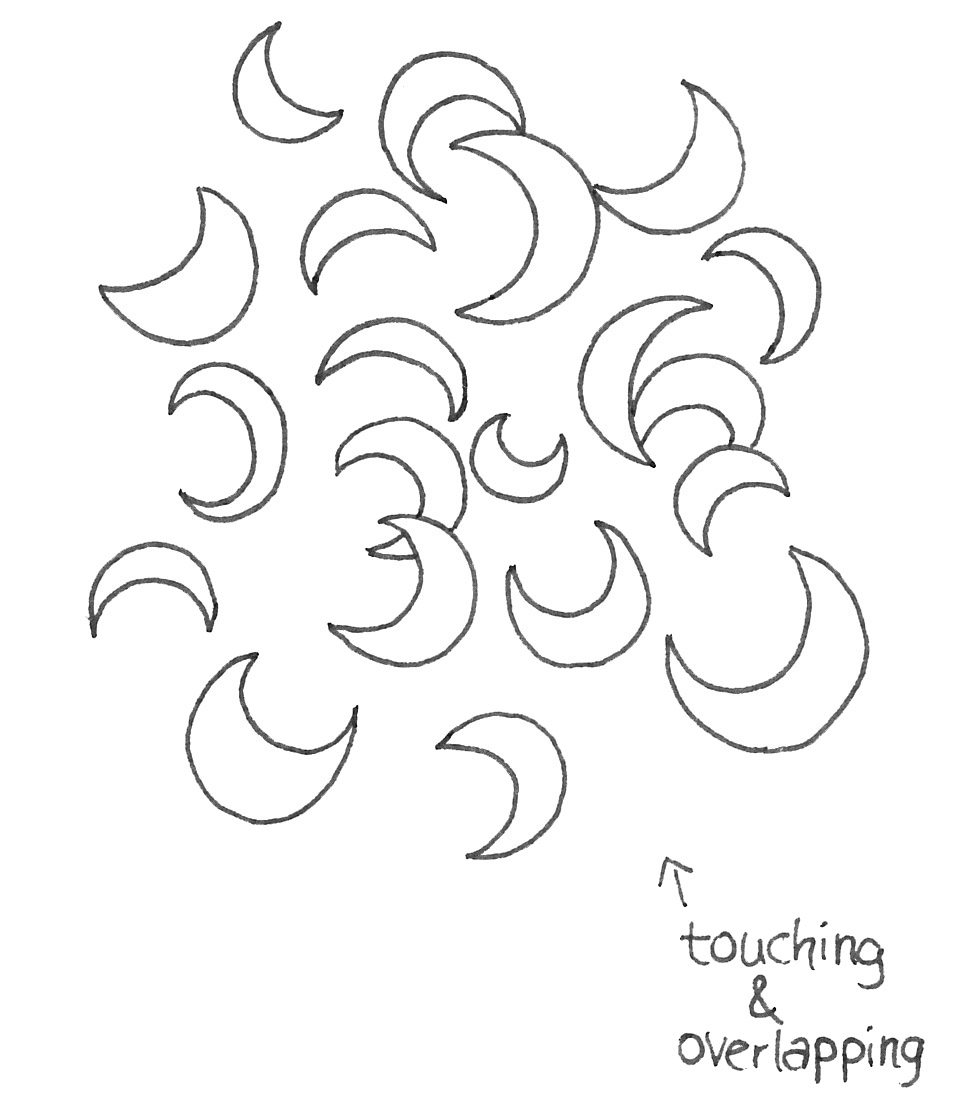
I do like this wild side of Molygon, too.
EDIT: Annette from CREA(R)TIVES let me know that this is actually another tangle released in 2014 by Hsin-ya Hsu. It goes by the name of Rocco and you can find it here.
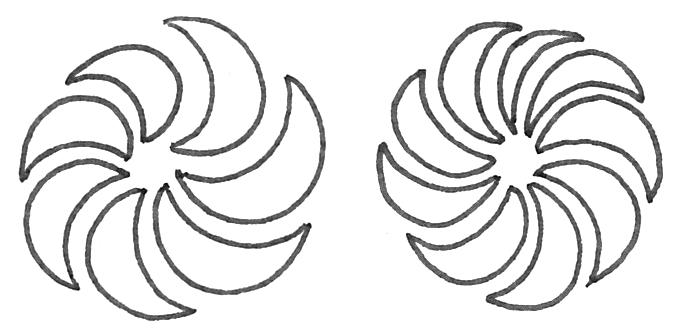
3. In the newsletter, Zentangle HQ gave a hint about the best lenght of the next adjacent “banana”. This was an eye opener for me because that is what I had most trouble figuring out. According to Zentangle HQ (as well es tested and verified by me) the ideal length for a new banana is about half the length of the one before. Ok, that’s kind of hard to explain (and maybe understand), but I hope the picture will illustrate this better:
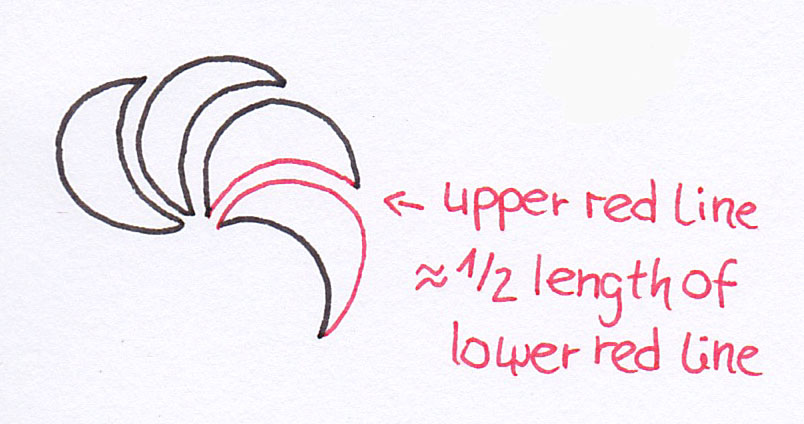
After a few rounds you do get the feeling that you cannot go all the way around, but about half is a good way to decide how far to go. Also try to keep the upper curve of your banana about the same shape all the time when you’re going around in a circle. That way, it gets a very harmonic look and the last banana will fit perfectly.
4. If you increase the length, though, you end up with growing shapes while a shorter length will resul in smaller shapes. Also drawing “thin” and “fat” bananas will give it a different look:
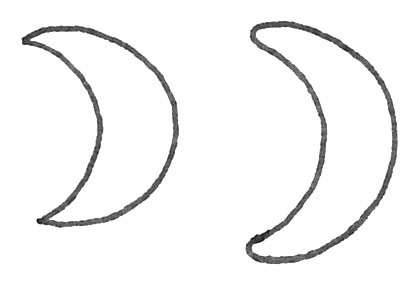
5. Up to you is also if you prefere Molygon to have sharp or soft cone ends (is that the right name..?). I prefer sharp ones for drawing but both look good.
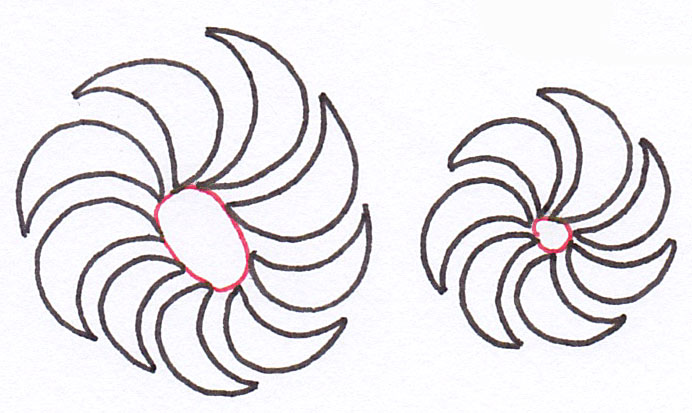
6. The last hint is about the circles. Did you notice that the circles seem to turn around a specific centre point? If you mark it down with a dot or simply visualise it for yourself, those circles will be really nice. You can either choose a round center point or an oval one. An oval center will result in a somewhat “flat” circle. And together with Molygon‘s curved shapes, some nice filling or shading, Molygon will become very 3D indeed. If it helps you, you can use your pencil to draw a circle or an oval where all the tips meet. I marked the circles in the next picture with a red pen so you can see it better:
These are the clues that I learned from other sources or found out while practising Molygon. Now let’s have some more fun with it!
PLAYING with Molygon
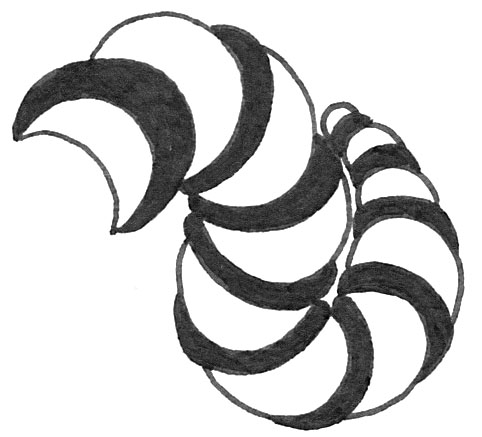
1. Vary the size of the bananas. Ok this will happen almost automatically, but you can use this consciously to achieve some really cool 3D effects:
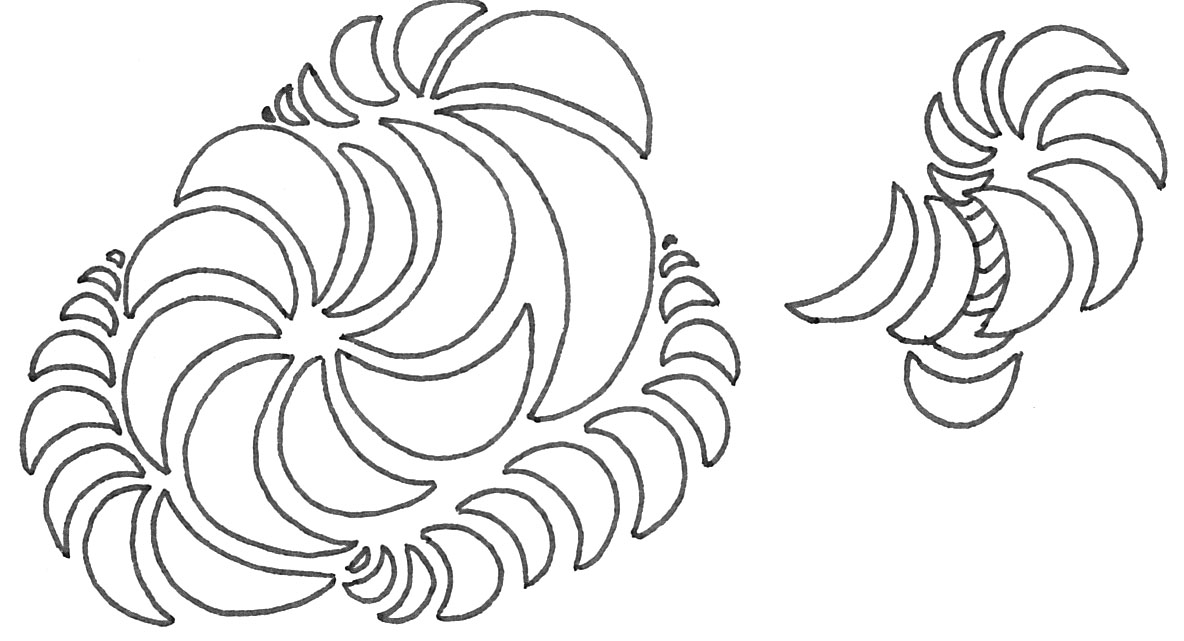
When you’re going over and under, I wouldn’t draw in the bananas that are going under – it looks quite confusing. It might work if you fill all the bananas black but..
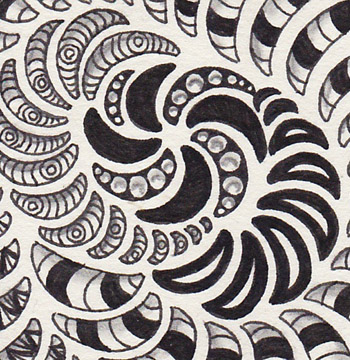
2. Use large bananas to connect two circles. Doesn’ it look almost like a bicycle? You might also like to let a “snake” branch out.
3. When you’re going round in circles, try to turn right & left. Even more than with Diva Dance, changing the direction of your circle or turning your snakes this way adds interest to your piece. What’s your go-to direction? I’m a leftie and I automatically tend to go clockwise. 🙂
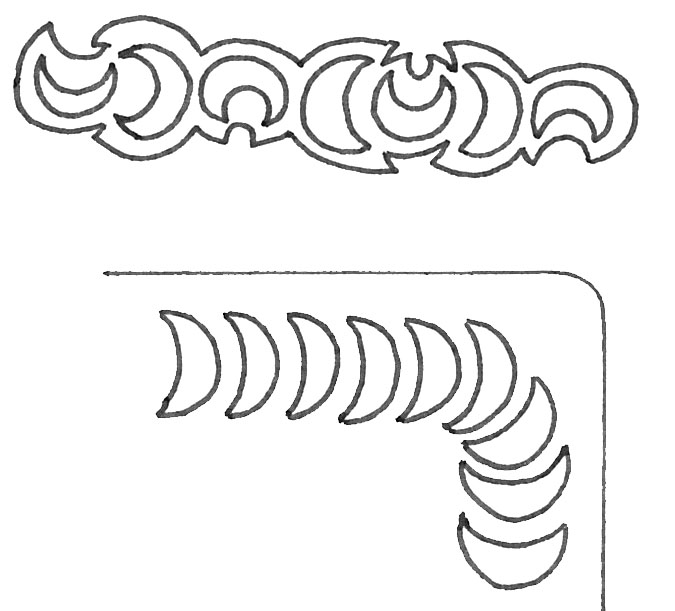
4. Use Molygon as a border. Molygon makes a nice, dynamic border, too. Changing the direction of every second banana, maybe adding an aura all around, makes a very fancy border, too.
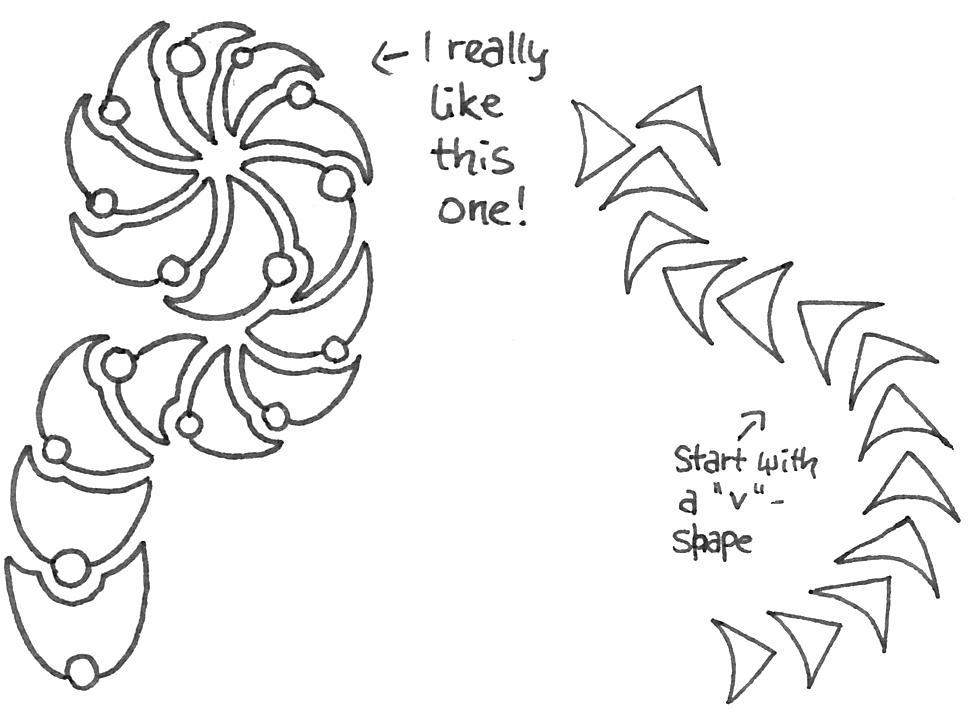
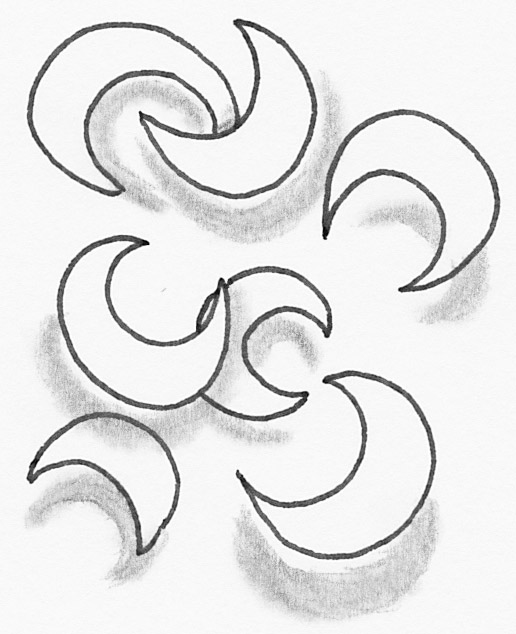
5. Modify the shape of the bananas. The basic idea is still the same, of course, but adding a circle or making the shape (partially) more angular, or anything else you might think of, will give Molygon an interesting new look, too.

6. Then, of course, the most obvious thing: fillings! Molygon is one of those tangles that really lends itself to filling it with patterns and and other tangles:
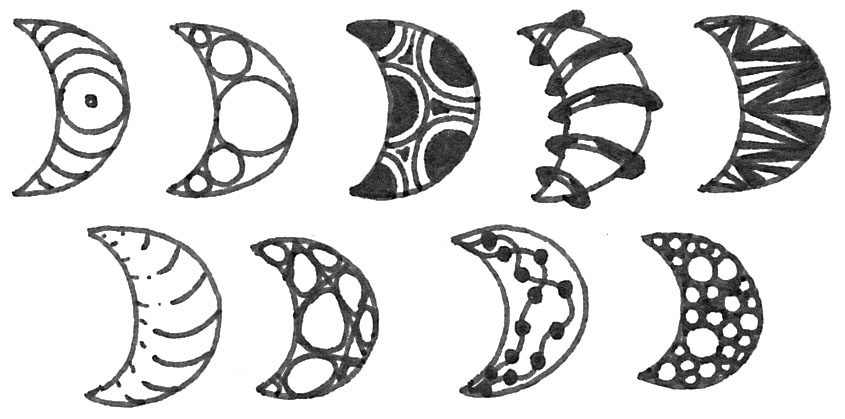
Of course, you might also want to fill in the gaps between the bananas – it now looks a liiiittle bit like Narwal, don’t you think..?
And while you’re at it: you might shade Molygon or shade below it to create a floating, 3D-effect. Shading below the bananas works especially well when you go for the wild Molygon:
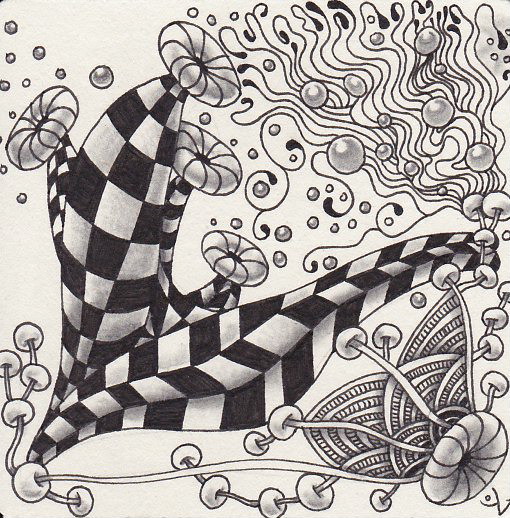
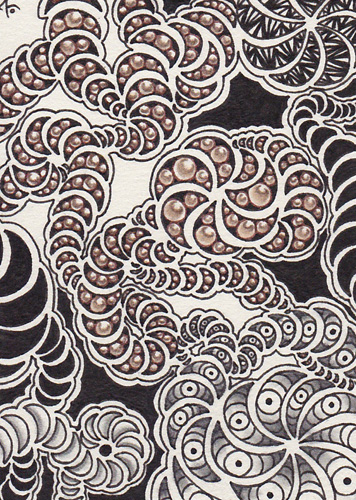
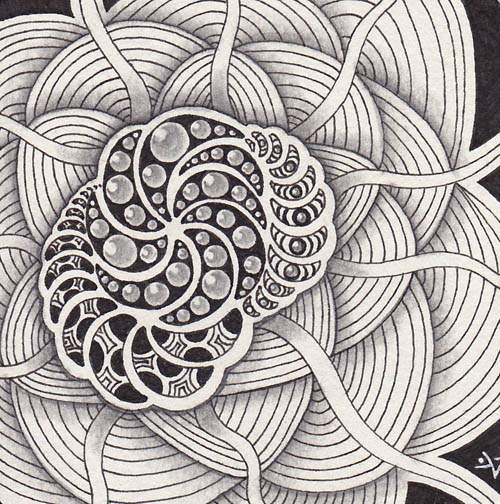
Last but not least I have some tiles I did with Molygon:
Bijou with a Molygon-monotangle

Another bijou with a Molygon-monotangle
ATC with a Molygon-monotangle
Tangles used: Molygon, Shattuck